Instagram is one of the best ways to promote your content and reach a larger audience. One of the best ways to ensure your content finds its way onto the “Explore” page is to create content with receives a large number of likes - and hey, who doesn’t like seeing those numbers go up and up.
Creating visually appealing images is a big part of standing out and getting the user to tap that screen twice. Today let’s go over some quick photo editing tips using the app Snapseed. Snapseed is a picture editing app that lets the user enhance photos and offers some great tools for photo editing on the run. Here are 5 quick Snapseed tips to get more likes on Instagram.
1 – Selective Adjuster
The Selective adjuster makes it possible to simply tap on any object in a photo and selectively adjust the brightness, structure, contrast, and saturation of a single point. Being able to isolate different areas of your photo is a great way to create more visually intriguing images that will grab your audience’s attention. Let’s look at this picture I took on my iPhone earlier this year –

This image is good, but by playing around with a few different selective adjustments we can create our own tone and focal point.

Here, you can see the spots I chose to edit.
Sky - Increased saturation and brightness
Trees - Increased saturation, contrast and brightness
Water - Decreased saturation and brightness
By darkening the water and adding strongly saturated colors to the rest of the picture we have changed the tone of the image and created a picture that is more visually appealing.
2 - Brush Tool
The brush tool is another great option for selectively adjusting different parts of your picture. The brush tool allows you to dodge and burn, edit exposure, change tones with temperature and increase or decrease vibrancy with saturation. Each elements opacity is adjustable while drawing on your image and you can even see where you have edited the image by clicking the eye button in the bottom right of your tool bar.
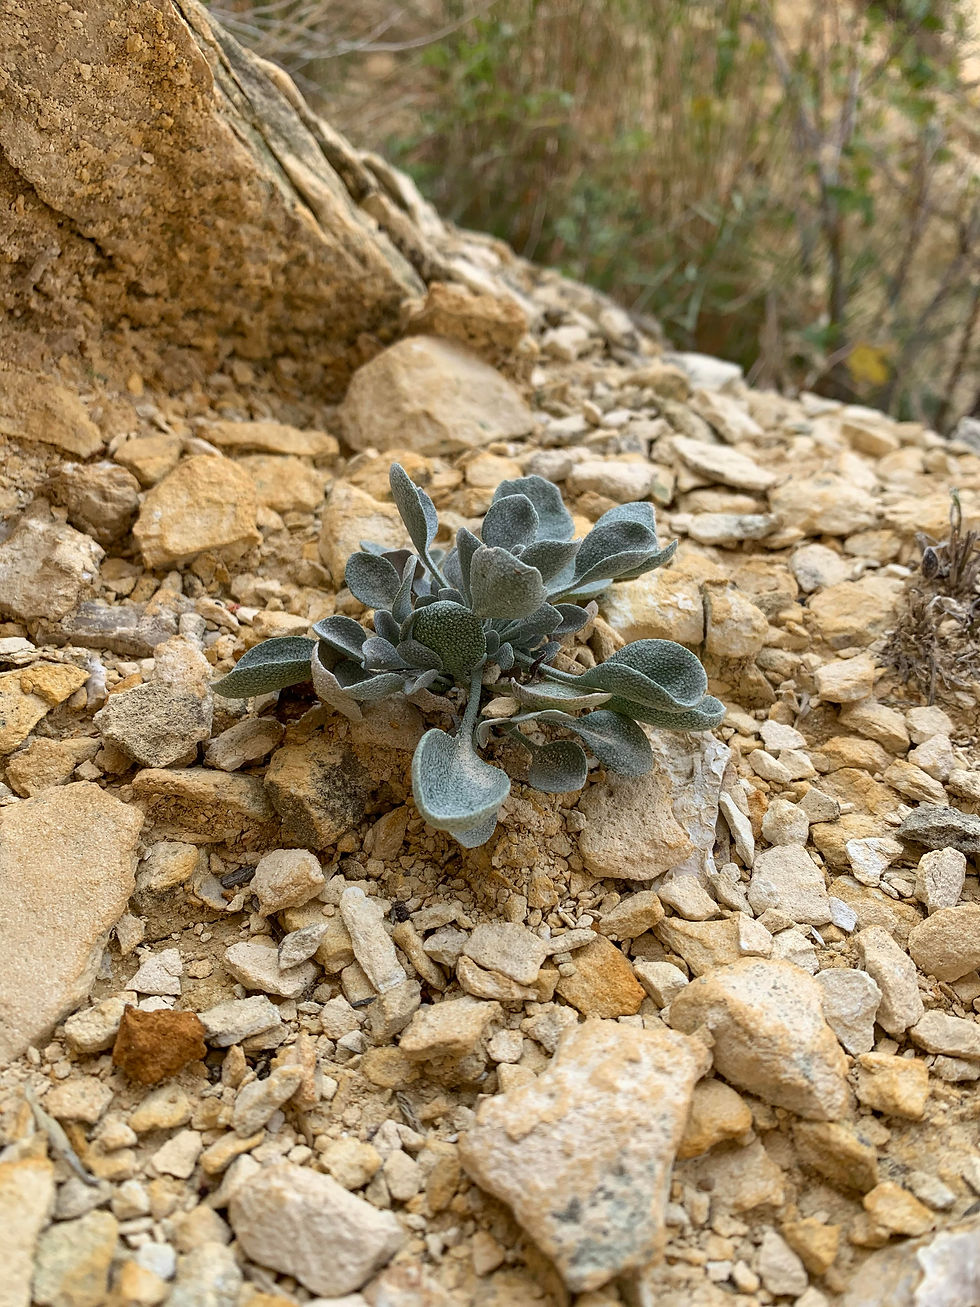
This is a great option when you have a small object you are trying to highlight. I'm going to use a picture I took while hiking to demonstrate how well this cool can highlight a focal point.

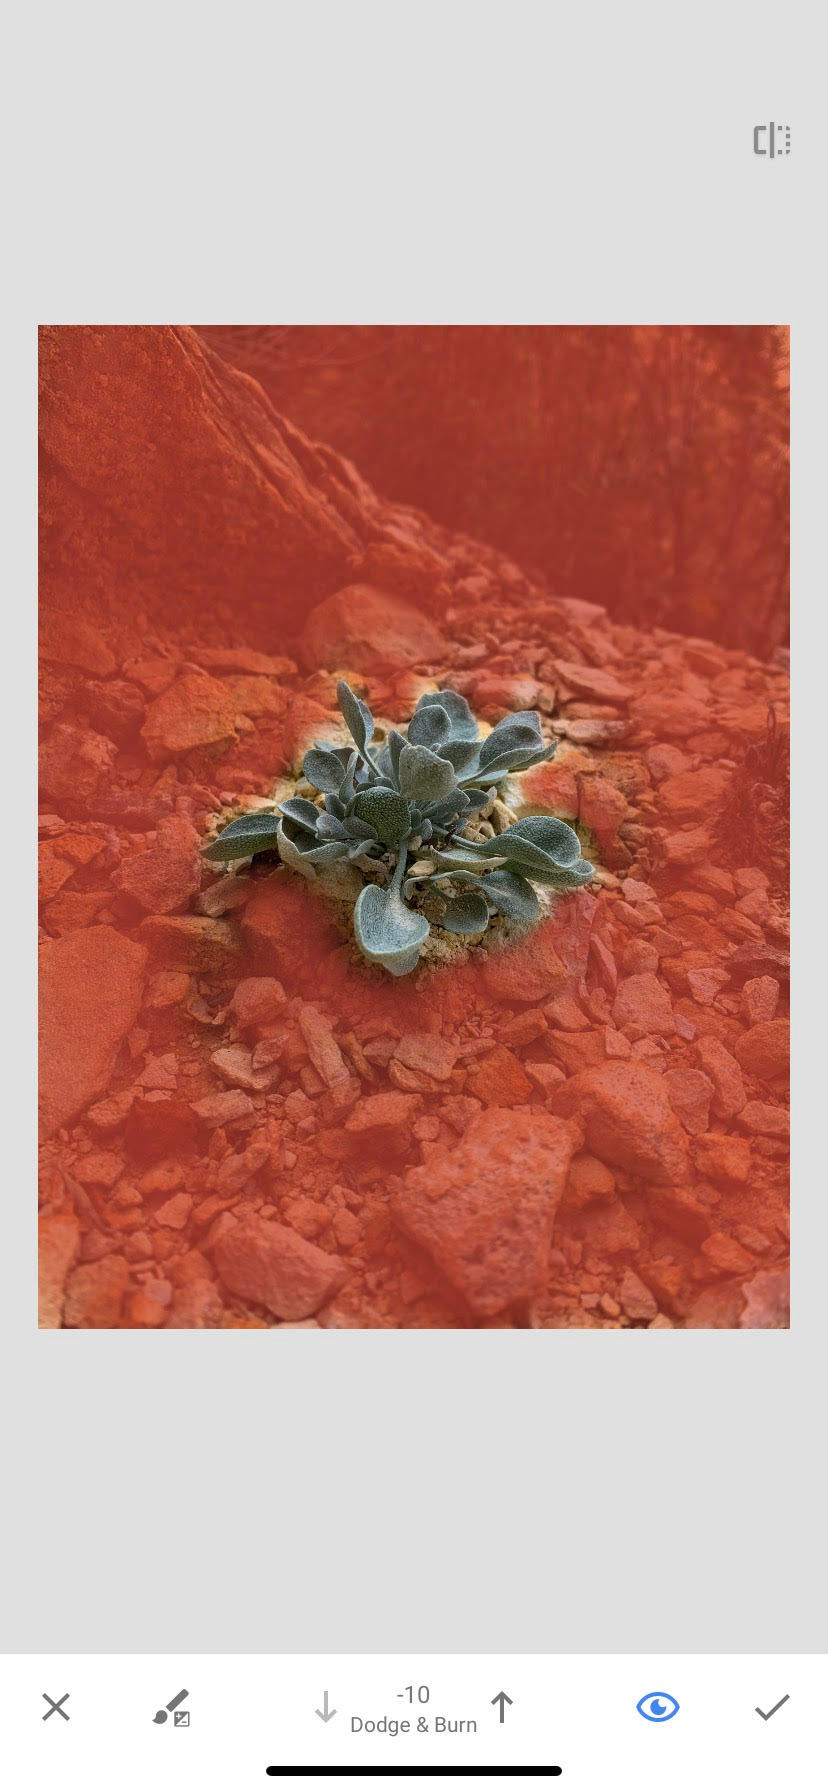
I want to highlight the little plant growing in the rocks. A great way to do this is by brushing the area surrounding the plant with the burn option from our brush tool set at -10.

By using the eye toggle at the bottom of my screen I can easily see the area I have brushed over shown here in red.
Darkening the total area around the plant to make it brighter and help it standout from the rocky background.

The final image turned out great, and the best part is - it was edited in less than a minute on my phone!
3 - Structure
The structure tool is a great way to increase details in any of your photos. It is found underneath the "detail" section in the tools tab. According to Google - "Structure Increase the amount of details in the image. Structure uses a unique algorithm to bring out the texture of objects throughout the photo, without affecting the edges of the objects. Sharpening Increase the amount of sharpness in the details of the image."
Just look at how it pulls every last crack out of this shattered glass, adding some much needed perspective to this image.
Before - After -


4 - Lens Blur
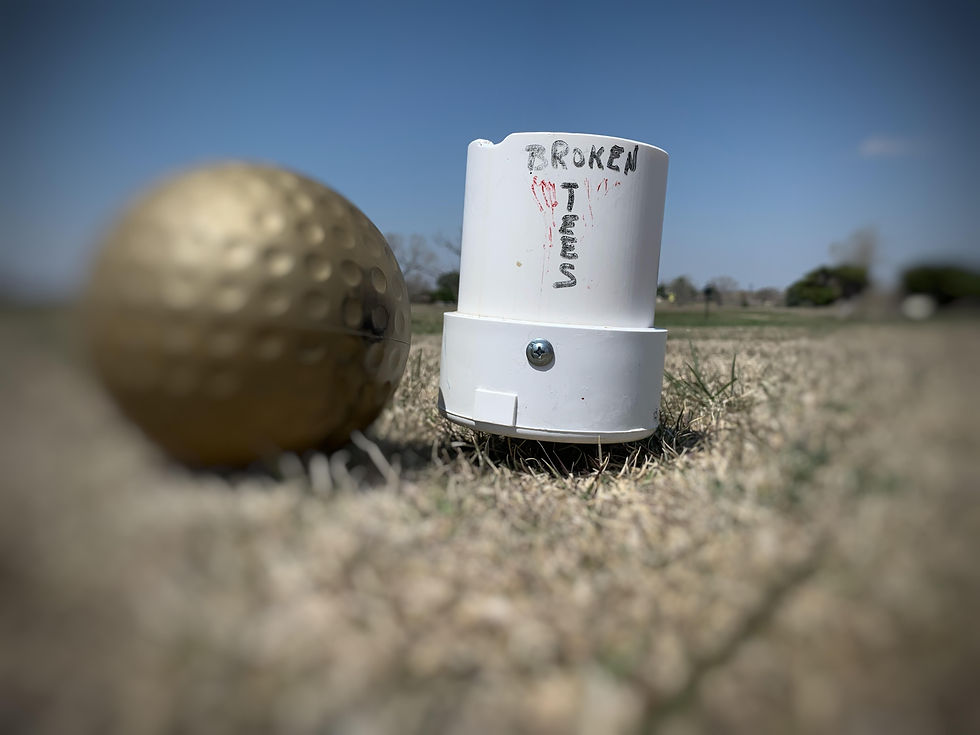
Similar to the brush tool, lens blur is a great way to create a focal point in almost any photo in a matter of seconds. You can edit the amount of blur, the transition to a clear photo and the vignette around the edges.

I'm happy with the overall composition of this photo, but I want to make sure the focus is on the "Broken Tees" container.

With just a few clicks, the focus of this picture is now undeniably obvious. Hopefully snatching the attention (and double tap) of your audience.
5 - Double Exposure
The double exposure tool allows you to transpose a 2nd picture onto another. This is a super quick and easy way to add a logo or texture to an image.
(Pro Tip - Having a PNG copy of your logo handy makes this process even easier and produces extremely professional looking images)
Here I have taken a picture of myself from the MIAA Conference Championship golf tournament and transposed a PNG of our schools mascot, instantly making the image look more professional.
Before - After -


Snapseed is a great way to edit photos fast and effectively, way beyond the few tools showcased here. These 5 Snapseed tips will take your Instagram promotion to the next level. The better your pictures look the better chance you have of earning that precious like.
Take some time to play around with the app and find your favorite tools and make sure to share them with us in the comments below!

Comments